COMPLETE 7 Day Southwest Road Trip Itinerary for 2025

We’ve got the perfect plan for you: a 7-day Southwest road trip that’s nothing short of epic.
Rewind to six years ago: we were just like you, gearing up for our first-ever visit to these majestic parks. Fast forward to now, after roaming the Southwest for nearly a year, we’re bursting with tips and tricks to share.
Our journey has been tweaked and polished into what we proudly call the ultimate 7-day Southwest road trip itinerary. Every recommendation has been tested by yours truly!
It’s a route that’s perfect for everyone – whether you’re flying solo, traveling with your better half, or adventuring with the kiddos.
In this blog post, we’re unveiling our perfected 7-day Southwest road trip itinerary.
It’s your ticket to exploring some of the most breathtaking landscapes America has to offer. So, what are you waiting for? Pack your bags, grab your map, and let’s hit the road! 🌟🚗
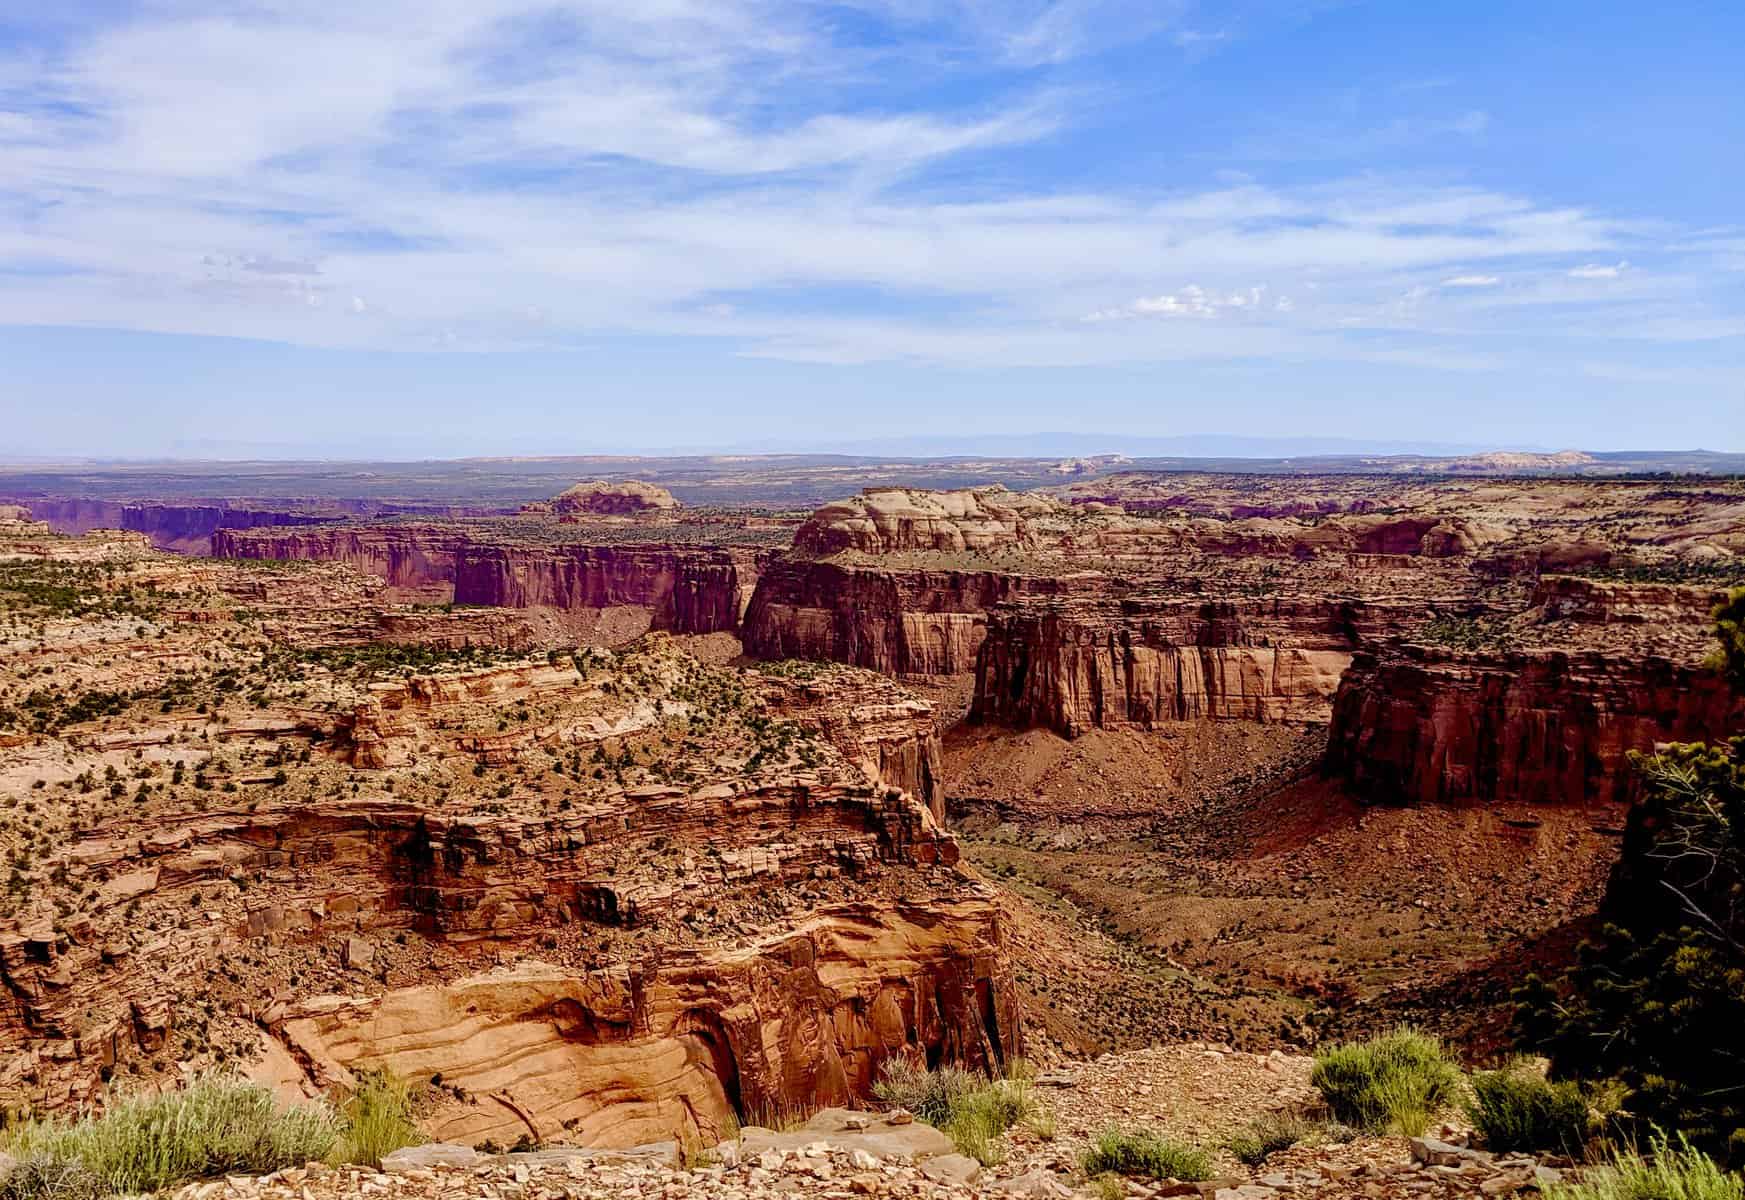
7 Day Southwest Road Trip: Itinerary Overview
This 7 day Southwest Road Trip itinerary is built to optimize your time while seeing all the best sites!
There is no guesswork here –
we have done this ourselves and have added modifications so that it is sure to deliver a superb experience.
During the 7-day national park tour from las vegas, you will go in and out of National and State parks and see a variety of diverse landscapes.
We have strategically placed drives so that you are not driving too far at any one time and that you get some built-in rest time so your legs don’t tire out!
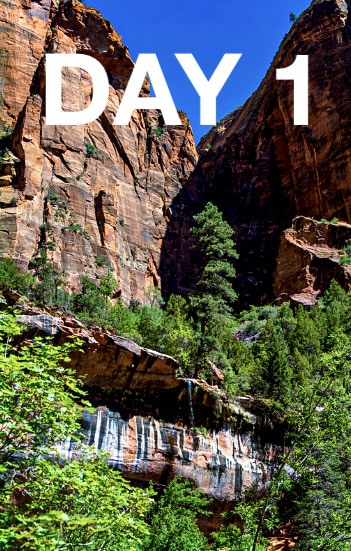
DAY 1 of your 7 Day Southwest Road Trip:
- Drive from Las Vegas to Zion National Park – 3 hours
- Rent your car with Discover Cars for the best and most reliable deal
- Lunch at In-N-Out Burger in St. George
- Pro tip: grab snacks at the grocery store here too! We always take this collapsible cooler with us for this purpose.
- Explore Zion National Park
- Shuttle Stop #8 Big Bend – walk along the river
- Shuttle Stop #6 The Grotto – 2.5 mile Kayenta Trail to the Lower Emerald Pool
- Shuttle Stop #4 Court of Patriarchs – 0.2 mile walk to the viewpoint
- Sunset at Shuttle Stop #3 Canyon Junction
- Our Pick for Hotel is Holiday Inn Express Springdale
- Dinner at Bit & Spur Saloon
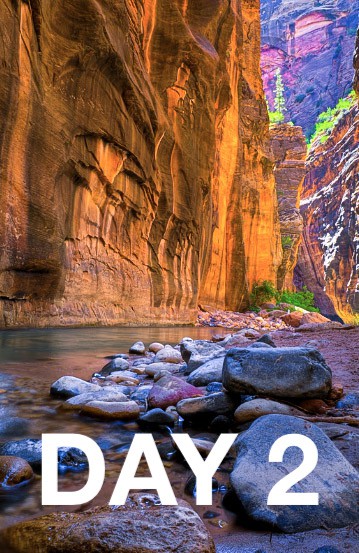
DAY 2 of your 7 Day Southwest Road Trip:
- Sunrise Hike at Angel’s Landing
- Permit required to do the last 0.5 mile – grab one here
- The hike is still worth it even if you can’t do the permitted section! Just keep going to the left.
- Brunch at MeMe’s Cafe
- Afternoon exploration of The Narrows – 3 to 8-mile hike.
- Dinner at Spotted Dog
- A Great night of sleep at Holiday Inn Express Springdale
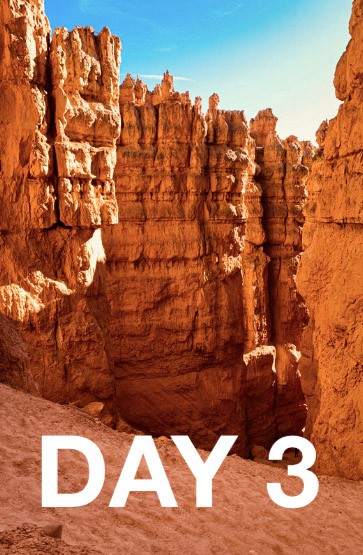
DAY 3 of your 7 Day Southwest Road Trip:
- 2 Drive to Bryce Canyon – start early!
- Optional quick, 1-mile hike at Zion Canyon Overlook trail
- Breakfast/Lunch at Bryce Canyon Pines
- Bryce Canyon Hiking
- 3.1-mile Navajo Loop and Queens Garden Trail
- Bryce Canyon Southern Scenic Drive – 30 miles roundtrip
- Bristlecone Loop Trail – 1 mile
- 9 scenic stops on the way “back”
- Mossy Cave Trail – 1 mile
- 1 Hour drive to Escalante
- Dinner at Escalante Outfitters Cafe
- Stay at the lovely Canyon Country Lodge
DAY 4 of your 7 Day Southwest Road Trip:
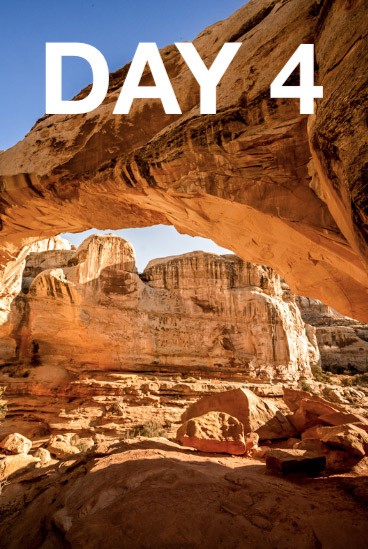
- Hike the Lower Calf Creek Falls – 6 miles
- Lunch at the James Beard Awarded Hell’s Backbone Grill & Farm
- 45-minute drive to Capitol Reef National Monument
- Hike Capitol Reef National Monument
- Grand Wash and Cassidy Arch – 7.5 miles total but flat for over half of it
- Capitol Reef National Monument Scenic Drive
- Dinner at Chak Balam Mexican Restaurant
- Stay at Capitol Reef Resort – don’t skip the smores!
DAY 5 of your 7 Day Southwest Road Trip:
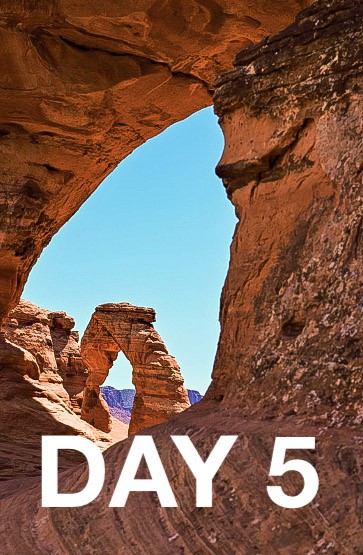
- 3 Hour drive to Arches National Park
- Coffee stop at Green River Coffee Company.
- Explore Arches (permit required – grab one here):
- Delicate Arch Trail – 3.2 miles
- Rock Art Panel at Wolfe Ranch
- Window Loop – 1.2 miles (mostly paved)
- Garden of Eden
- Owl Rock Formation
- Balancing Rock
- Dinner at Moab Canyon Pizza Co.
- Try Glamping – these Under Canvas tents are very impressive!
DAY 6 of your 7 Day Southwest Road Trip
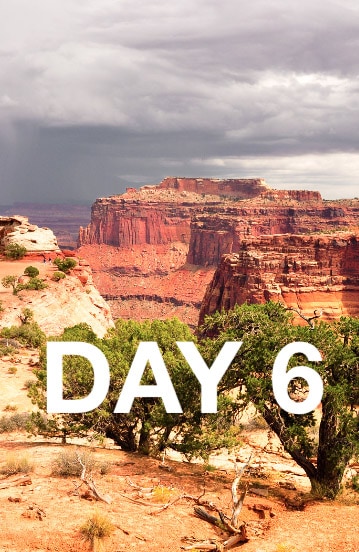
- Watch the sunrise through the iconic Mesa Arch at Canyonlands National Park
- Hike in Canyonlands National Park:
- White Rim Overlook – 1.8 miles
- Aztec Butte – 1.7 miles
- Upheaval Dome – 0.2 or 1.2-mile options
- Optional pit spot at Dead Horse Point State Park
- 5 Hour Drive to Page, AZ
- Dinner at Patio Diner in Blanding (2 hours into the drive)
- Dinner in Page, AZ at BirdHouse
- Get some rest at the Best Western View of Lake Powell Hotel in Page!
DAY 7 of your 7 Day Southwest Road Trip
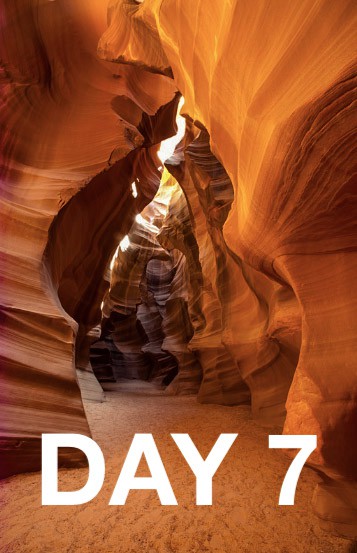
- Breakfast at Hot N Sweet Coffee and Donut Shop
- Experience the jaw-dropping Lower Antelope Canyon – you MUST have a guided tour!
- Check out the Lake Powell Dam on a short half-mile hike
- Lunch at Sunset 89
- See Horseshoe Bend – 1.5 mile walk that is easy (does NOT require a guide)
- Drive back to Las Vegas – 4 hours and 20 minutes
- St. George is a great place to stop for dinner – Check out Viva Chicken
- Need a place to stay in Las Vegas? We love the Venetian
Best Time to Do a 7 Day Southwest Road Trip
We love to take this trip in May, June, or September. The temperatures are more on the mild side, and the crowds are a bit thinner.
In May, spring has just started in the last few weeks, so the blooms are beautiful plus the temperatures are moderate. The length of the days and sunshine are longer which allows for tons of exploration.
June is much the same as May, just a bit warmer! Additionally, the parks will not be as crowded as they get during the peak summer months.
The drawback, however, is you may find that a few hikes might still be closed in May and June from the snow that year. Most commonly this affects The Narrows in Zion National Park.
July and August are still good months to do a 7 day southwest road trip from Las Vegas. They are the hottest months of the year and also bring in the largest crowds. You’ll find that nothing should be closed due to snow.
In September, the temperatures start to cool again, with the leaves starting to change color in the second half of the month. You may have to deal with a higher chance of rain, but you’ll benefit from a less crowded park and everything will hopefully be open.
In October, temperatures really start to drop and snow begins. The snow will continue through March with April bringing some warmer temperatures and the beginning of Spring.
Best Way to Get Around
Car
We love a road trip in a car. We find it to be super fast and efficient to get around. You can either camp out of your car for maximum flexibility or stay at Bed and Breakfasts/hotels along the way.
We grabbed our rental at the Las Vegas Airport. If available, try to get a hybrid! This will help you keep fuel costs low.
Check out our packing list for a road trip! We use this list even with a rental car.
We are big fans of Discover Cars – we use them abroad as well as in the USA to get the best rates. Their customer service is top-notch!
RV
It is very common to RV in these areas! There are ample places to stay with your RV as long as you book ahead of time.
When booking an RV (or using your own), be sure to be mindful of the restrictions in some parks on the size of vehicles allowed. Zion National Park has a restriction of 19 feet for part of the park.
Cruise America is an easy place to find an RV for your 7-day national park tour from Las Vegas!
7 Day Southwest Road Trip from Las Vegas
Day 1 – Zion National Park

Driving from Las Vegas to Zion National Park
It’s day 1! WAHOO! It is officially time to kick off your 7 Day Southwest Road Trip from Las Vegas.
First up, is a 2 hour and 50 minute (167 miles) drive from Las Vegas to Zion National Park.
The drive is a nice one – alternating between suburbs and beautiful desert scapes. It is also mostly a straight shot, following I-15 N.
The last large city you will see for the next 7 days is St. George, so if you need to pick anything up, we suggest stopping there for the most options!
Zion National Park Entry Cost
Zion National Park does have a fee to get inside.
We highly recommend going ahead and purchasing the Interagency Annual Pass for $80.00. This will get you into Zion as well as all the other federal parks you will be traveling to on your 7 day road trip from Las Vegas.
You will save more than a few dollars with this pass since entry at each National Park is typically $35!
Getting Around Zion National Park
Zion National Park gets more than 4 million visitors a year! For this reason, you will find the Park System has a shuttle service to take people in and out of the park to limit any traffic problems.
There is a free shuttle (as long as you have paid park admission) inside the park from March to November.
The shuttles are great! They come frequently and are a great way to enjoy the scenery while getting through the park.
You can park inside Zion at the Visitor Center and grab the shuttle. Please note, however, that these lots typically fill up by 8am.
Additionally, there is another free shuttle from Springdale, the town outside of Zion, that will take you into the park! This is another great option.

Day 1 Itinerary for Exploring Zion National Park
On your first day exploring Zion Canyon, we recommend taking the shuttle bus “tour” and getting off to do many of the short hikes. This will do a great job of getting you oriented to the park and showing you its vastness.
We’d recommend doing these from the back to the front. The shuttle is going to go from the Visitor Center, stop #1, to the “back” of the park with stop #9, Temple of Sinawava.
This is a great way to start and ease your legs into your 7 Day Southwest road trip.
Shuttle Stop # 8 – Big Bend
The Big Bend bus stop is deep into Zion Canyon. Getting off at this stop and taking in the grandeur of the Park from Big Bend Viewpoint is a great first stop.
To warm up your legs, take a walk along the river with the Virgin River Walk. This is more or less a walk in the sand along the river. It is gorgeous. You can walk as far as you’d like – we went about a half mile and then turned around and went back.
From this hike, we saw a group of people rock climbing one of the huge rock faces in the Canyon. It was breathtaking! 🧗
Shuttle Stop # 7 – Weeping Rock
This stop has our favorite short hike – Weeping Rock!
Please note: this hike closed in 2022, and they are working to reopen it – please check to see if it is open first!
This is a short walk (10-15 minutes) at a steady incline to a very cool rock face that has water tricking down it. This gives the appearance of the… rock weeping 🙂
It was gorgeous! Plus, we ran into some native deer on the walk. Always make sure to be respectful of all wildlife – we are visitors in their home!
Shuttle Stop # 6 – The Grotto
Next up, we are going to explore the Emerald Pools! This is the longest hike (2.5-3 miles if you do all 3 pools) we will suggest today.
We recommend starting on the Kayenta Trail and hiking to the Lower Emerald Pool. This trail is marked as moderate but it is not tricky – it is unpaved and has a few inclines.
Once at the beautiful Lower Emerald Pool, you can hike up to the 2 additional Pools: Middle and Upper. It is another .4 miles to the Middle Pool and the Upper Pool is .25 miles past that!
Once you have soaked in the beauty of the 3 Emerald Pools, you can hike back out the Lower Emerald Pool trail to end up at the Zion Lodge (Shuttle Stop #5).
Shuttle Stop # 4 – Court of Patriarchs
The Court of Patriarchs is a series of sandstone cliffs that are named after the Biblical Patriarchs, Abraham, Isaac, and Jacob.
Just off the Shuttle stop, you’ll find a short 2-3 minute walk to a great viewpoint of the rocks. Additionally, you can get some fantastic pictures from this area!
Shuttle Stop # 3 – Canyon Junction
Getting close to sunset? The bridge at Canyon Junction is a great place to watch the sunset and wrap up your first day inside Zion National Park.
🎉 Bonus: Have more time? We recommend visiting the museum at the Visitor Center. They have done a wonderful job explaining the history. The video is entertaining and informative!
Where to Stay for Zion National Park
If you can, we recommend staying in Springdale. It is very close to the park but also has plenty of food options!
We LOVED Zion Canyon Bed and Breakfast! The family that owns and operates this B+B is so sweet. The breakfast was perfect and the beds were so comfortable. Additionally, the property is right next to some beautiful canyons, adding to the experience!

Additionally, there are a number of hotels in the area that we recommend:
There are also some rental properties that are perfect for a group of people:
Lastly, if you’re looking to camp, you will find a number of campgrounds:
- Camping IN Zion National Park – watch the location! Some are far from the main Zion Canyon
- Zion Canyon Campground & RV Park (the name is misleading – it is not in the park but next to the entrance!)
- Zion River Resort RV Park & Campground
Where to Eat in Zion National Park
There are many great places to grab a bite to eat in Springdale. A few of our favorites were:
- Bit & Spur Saloon – Funky restaurant with great energy and delicious food. Nicholas loved his burrito!
- Spotted Dog – Bold flavors come out of this farm-to-table restaurant! Try to get a table outside for spectacular views during your meal
- Meme’s Cafe – a causal place for a nourishing breakfast or lunch before a fulfilling day exploring
- Springdale Candy Company – we’d argue that there is nothing better than ice cream after a long day hiking. Grab a cone here!
Day 2 – Zion National Park
It’s day 2! Today is packed with some of the grandest views in Zion: Angel’s Landing and The Narrows.
We recommend starting this day off as early as possible. The first bus typically leaves between 6 and 6:15 am – this is the bus you should be on!
Angel’s Landing
Before you get started, we recommend watching a few YouTube videos on the final part of Angel’s Landing. It has steep drop-offs on either side.
If heights make you uncomfortable, the final section of this hike might not be for you.

If you would like to do it, make sure you have a permit! You can apply ahead of time or the day before. You can also find passes on the hike listing on AllTrails.
Even if you don’t get a permit or don’t want to hike the final steep section, it is worth doing the first 3/4ths of this trail!
You will get off at shuttle stop #6 The Grotto. At this stop, you’ll take the Grotto Trail and then the West Rim Trail. Eventually, you’ll make it to a series of switchbacks that take you all the way up the canyon wall.
The paths for the switchbacks are pretty wide so if heights aren’t your favorite, you can stay close to the wall and well away from the edge easily.
Once at the top of the switchback, you will be greeted by the final .5 mile, Angel’s Landing (to the right when you finish the switchbacks). You can only do this section if you have a permit.
Take your time during this section, watching your foot placement and breath! You can do it! You will be rewarded with glorious views at the end.
Alternatively (or in addition to!), keep taking the West Rim Trail to the left when you get off the switchbacks. This trail goes on for miles, so we just self-paced another mile or so and then turned around and walked back. The views are breathtaking!!
After you complete this trail, take a break – you deserve it! More than likely, it is still mid-morning so you can hang out for a few hours and get food before the afternoon’s exploration.
The Narrows
In the afternoon, it is time to embark on a breathtaking journey down the Virgin River. This hike is called The Narrows.
You get there from Shuttle Stop #9 – it is at the end of Riverside Walk (a great stroll!)

During this hike, you will be walking in water that is sometimes waist/chest deep. You can do the Narrows without any special equipment… be we would strongly warn against it!
At a minimum, we would recommend a strong walking stick, dry socks, and waterproof shoes. There are a number of places in Springdale that will rent you this equipment!
Additionally, we are recommending the “bottoms-up” approach to the narrows. This does not require a permit. If you want to do the full 16 miles, you will need to get a permit and take the top-up approach.
This hike is like no other we have done – it almost felt like you’re on a different planet! Take your time and enjoy! You will go as far as you are comfortable and then turn around and go back to Riverside Walk!
This concludes our 2 day Zion National Park itinerary! Rest up, as we have a lot more to do in what remains of our 7 day southwest road trip!
Day 3 – Bryce Canyon National Park
Driving from Zion National Park to Bryce Canyon
It’s day 3 of your 7 Day Southwest road trip! We recommend starting off the day early since there is a LOT packed into today.
First up, is the drive from Zion to Bryce Canyon. It is a pretty easy drive – just shy of 2 hours total and 84 miles. The initial leg is on Route 9 out of Zion.
If you start early enough, we highly recommend stopping for one last hike on your way out of Zion. Zion Canyon Overlook trail is a 1-mile out and back that has incredible views, especially at sunrise! This 30 to 60-minute stop is well worth the time!

Once you begin driving again and get to Mt. Carmel Junction, you’ll take Route 89 for 43 miles until you can take a left onto Route 12.
The views along the ride are beautiful – enjoy the ride!
Day 3 Bryce Canyon National Park Itinerary
Bryce Canyon National Park is home to a massive network of red rock formations, known as hoodoos, which were formed over millions of years by erosion and wind.
Today, Bryce Canyon is a mecca for hikers and nature lovers, who come from all over the world to explore its unique landscapes.
There are numerous hiking trails of varying difficulty levels, and visitors can also take part in ranger-led programs to learn more about the park’s history and ecology.
We recommend stopping at the visitor center first to see what events they have going on that day!
Navajo Loop and Queens Garden Trail
Navajo Loop and Queens Garden Trail is arguably the most iconic hike in Bryce Canyon.
You’ll start this trail from the Sunrise Point parking lot. The full loop is 3.1 miles and it has a 649-foot elevation change.
There are countless places to stop and take in the breathtaking views so don’t let the elevation change discourage you!

On this trail, you will go through what feels like a forest of hoodoos including Thor’s hammer, Queen Victoria (the trail’s namesake), and Two Bridges. It is magical – the whole hike feels like a white, red, and orange wonderland.
If you’d like to make the hike shorter, you could just do the Queens Garden trail which is closer to 1 mile (though it still has quite the elevation change).
Southern Scenic Drive
Next, jump in the car for the Southern Scenic Drive. This 15-mile (one-way) drive will take you up another 2,000 feet in elevation. You’ll see more trees and the vastness of the rock formations.
The drive 1 way takes about 30 minutes.
On the drive up, just take in the views! You’d get to your turnaround place at Rainbow Point. Here, we recommend getting out and doing the next hike on our list (Bristlecone Loop).
On the way back on the Southern Scenic drive, stop at each of the 9 overlooks. They are on the right side of the road so pulling off will be easy and safe!
Our favorite stop is the Natural Bridge, one of several natural arches in Bryce Canyon.

Bristlecone Loop Trail
This 1-mile roundtrip hike is a bit easier on the body with less than 90 feet of elevation change. You will start this hike from Rainbow Point, which is one of the highest points in Bryce Canyon at 9,100 feet.
The forest is sparkled with Blue Spruce, Douglas Fir, and White Fir trees and smells delicious! Forest fires have gotten to this part of the park so it is regrowing but still beautiful. The views you’ll see from multiple viewpoints are incredible.
Bonus hike in the Park: Tower Bridge Trail
If you’re going to opt for an overnight in Bryce Canyon and/or want another option for hiking, we recommend the Tower Bridge Trail.
Tower Bridge Trail is a moderate 3.4-mile trail to see the Tower Bridge.
The moderate rating is due to its pretty dramatic elevation change (over 900 feet). It will get your heart beating – just take it slow!
The views are astounding on this trail. We found ourselves “oohing and ahhing” the whole time!
This trail is part of the 8-mile Fairyland Loop trail so you can keep going on this trail if you’d like! You will come out at Sunrise Point.
Mossy Cave Trail
This is a must-see hike!
Located outside of the main park, you’ll find a pull-off for Mossy Cave on the way toward Tropic, Utah. This trail is barely a mile with slight elevation changes.
You will see more stunning hoodoos as well as a fantastic waterfall!

The waterfall is brilliant – the moss from the cave juxtaposed next to the bright orange hoodoos is breathtaking. Don’t miss this short but impactful hike!
Where to Eat in Bryce Canyon National Park
Worked up an appetite? We sure did!
We grabbed a late and hearty lunch at Bryce Canyon Pines.
A little bit further down the road is the town of Tropic which has several dining options!
Driving from Bryce Canyon National Park to Escalante
After fueling up, we recommend going ahead and driving to Escalante.
The drive to the Escalante area is only 45 minutes to an hour which will help cut down on your travel time tomorrow.
Keep driving along Route 12. You will come across some fantastic views along the way – it is truly incredible how diverse the landscape is.

Where to Stay in Escalante
We stayed at the Canyon Country Lodge – the hot tub and super comfy bed were a much-appreciated respite for our sore muscles! We enjoyed getting to chat with other travelers in the community pool area and at breakfast.
Additionally, there are a few other hotels in the area that you might check out:
There are also some rental properties that are perfect for a group of people:
- Escalante Pioneer Home
- Escalante Home w/ Yard, Porch & Mtn Views!
- Escalante Home w/ Hot Tub – Near Nat’l Parks!
Lastly, if you’re looking to camp, you will find a number of campgrounds:
Where to Eat in Escalante
Escalante is not super large but they do have a number of food options!
Day 4 – Escalante and Capitol Reef National Park
A Morning in Escalante
Escalante is a unique and diverse landscape in Utah – it would be very easy to spend a full day in Escalante exploring the slot canyons and various state parks.
However, since we just have a morning to explore Escalante, we recommend spending it at Lower Calf Creek Falls. This hike is gorgeous, and at the end, you are rewarded with a spectacular 126-foot waterfall.

The hike is 6 miles roundtrip but the trail is pretty easy – mostly flat with some short elevation changes. The walk flies by since you have so much to look at along the way!
Once you make it to the waterfall, there is a pool at the base that many people swim in. We didn’t have our bathing suits with us but we did wade into the water up to our knees – the water was ice cold but refreshing.
The hike begins from Calf Creek Campground and there is a $5 fee for parking. Since this is a state park, you can not use your National Park Pass but we assure you, the $5 is well worth it!
Driving from Escalante to Capitol Reef National Park
After your morning hike, you are able to give your legs a break while you drive to our next destination – Capital Reef National Park. The full drive is about 1 hour and 15 minutes (54 miles).
Kelsea thought this was the coolest of all our drives – you head up into the mountains and are greeted by huge trees and probably some snow (depending on when you make the drive!). Then 20 minutes later, you are back in the desert area. A scenic drive for sure!
If you’d like to grab a meal on the way, head straight to Hell’s Backbone Grill & Farm in Boulder. This restaurant is only 12 minutes from the Calf Creek Campground and then an hour to Capital Reef National Park.

At Hell’s Backbone Grill & Farm, everything is grown locally and is organic and sustainably sourced. A large portion of what is served is harvested from their own six-acre farm!
The food packs a big flavor punch and consistently receives accolades, including one of the highest Zagat ratings in all of Utah. Most recently, they were a semifinalist for the 2022 James Beard Award for Outstanding Restaurant!
We loved our meal so much, Kelsea even got their cookbook! We’d venture to say it was the best meal of our 7 day Southwest road trip.
Definitely take a look at the Hell’s Backbone Grill & Farm website to see if they will be open when you are passing through.
Capitol Reef National Park Itinerary
Capitol Reef National Monument is severely underrated in our option – the landscape is nothing short of incredible! It is home to a jaw-dropping “wrinkle on the earth”, an almost 100-mile geological monocline, which is called the Waterpocket Fold.
We recommend 1 longer hike and then a drive to see the most out of Capitol Reef National Park in the afternoon.
Grand Wash and Cassidy Arch
As always, start at the Visitor Center to check for any trail closings or special events taking place. After that, head back out of the park to route 24 and down to the Grand Wash Trailhead (4.5 miles).
From the Grand Wash Trailhead, start the Grand Wash trail and take it all the way to Cassidy Arch. In total, this hike will be about 7.5 miles.
The Grand Wash portion is mostly flat and walking along the dried-up river bed with the stunning canyon walls on either side. It is similar to hiking the narrows in Zion National Park, but you get to remain dry!

We loved this portion of the hike, and since it was flat, it went rather quickly!
At about 2.25 miles, you will see the entrance to begin a trek up to Cassidy Arch that you will want to take.
Along this trail, you’ll follow the cranes and stairs up the canyon. We did find that the markings were a little less obvious than we would have preferred.
Just stay calm and keep your eyes peeled! More will pop up. Additionally, this would be a great place to have an offline map downloaded from AllTrails.
You’ll end up with a breathtaking view down into the arch – a unique opportunity!

The Cassidy Arch section is about 2 miles roundtrip. You can then head back out the Wash Trail.
If you would prefer to make the full 7.5 mike hike a bit shorter, you can park at the Cassidy Arch parking lot on the Scenic Road “inside” the park. From there, you can do Cassidy Arch and then as large of a portion of the Grand Wash as you’d like!
Scenic Drive in Capitol Reef
Capitol Reef is large and like at Bryce Canyon, driving around is the best way to take in some of the sights.
Along State Route 24, there are numerous pull-offs between Behunin Cabin and the Visitor Center to look at. If you parked at Grand Wash, take a right out of the parking lot and go another 1.4 miles to Behunin Cabin.
After Behunin Cabin, you can take a left and head back toward the visitor center on Route 24. On the right-hand side, you’ll find stops for:
- Hickman Natural Bridge
- Petroglyphs Panels
- Fruita Schoolhouse
All of these places are worth a stop to take in the rich background of Capitol Reef National Park.
Once you have done the sights along Route 24, head back into the park and take the scenic drive to see the nature center, Fruita Barn, and several scenic pull-offs! The scenic drive is about 8 miles until it ends at Capitol Gorge Road.
Where to Stay in Capitol Reef
You are going to find the most options in Torrey.
We stayed at the Capitol Reef Resort right outside of Torrey. We did not find this motel to be nearly as luxurious as the website leads you to believe, but the bed was comfortable enough and the balcony view was stunning.

We also enjoyed the campfire and smores in the evening! It was a great ending to a fun day. The night sky in Capitol Reef is very visible, and we enjoyed stargazing.
A few other good hotel options in Torrey are:
If you’d rather stay in a rental, here are a few good options we found:
- Cozy, New Home with Breathtaking Views
- Brand New Cabin in the heart of Torrey
- Capitol Reef Home with fast Wi-Fi and washer/dryer
If you were going to camp, Capitol Reef is the place! The stars are amazing and the campgrounds do the best job of giving you the most visibility (less light).
Here are some good campground/RV places:
- Camp inside Capitol Reef National Park – there are a couple of campground options. Fruita is the developed campground and then there are 2 primitive campground sites. The primitive campgrounds provide a rare opportunity to see the night sky at its peak thanks to very minimal light pollution!
- Wonderland RV Park
- Sandcreek RV Park
Where to Eat in Capitol Reef
Once again, most of your options will be in Torrey! Some local favorites include:
Day 5 – Arches National Park
Driving from Capitol Reef National Park to Arches National Park
Day 5! We start today off with a drive to Arches National Park. This morning drive will take about 2 hours and 40 minutes (149 miles).
Fair warning, we did find this to be the least interesting of all the drives.
We spiced it up by stopping for a delicious latte in Green River at Green River Coffee Company. This stop is about an hour and a half into the drive!
Other than that, there is not much along the drive. However, you will make it to a major interstate (I-70) for a brief stint before you jump on Route 191 to go back south toward Moab.
Arches National Park Itinerary
First, you do need a timed entry reservation April-October.
This started in 2022 to help with the large crowds the park was seeing. You can get your ticket(s) on the NPS website 3 months before you’d like to go.
If there are any extra tickets, they will release them the day before at 6pm MDT.
Once you get your tickets, be sure to have them downloaded. Service can be spotty and you’ll need to have them ready to be allowed into the park!
Once in, you’ll be able to roam Arches! Arches National Park is a pretty accessible park as far as national parks go. There are a number of viewpoints that require minimal walking and are along a paved path.
The accessibility, plus the iconic views, do bring a lot of people to the park, even with the timed entry! Be sure to pack your patience, especially in the parking lots.
Delicate Arch Trail
Delicate Arch is “the” arch – the Arch that represents Utah on their license plate and has been photographed more times than reasonable to count.
The arch is stunning… and it brings in a crowd!

Start your Arches experience off at this trail – the goal is to start it before too many people are in the park doing it as well.
The hike itself is a moderate to hefty incline at the beginning. You will also encounter a pretty big drop-off at one point but keep pressing on! Delicate Arch is right around the corner and well worth it.
At the arch itself, a line tends to form to take photos – this is another great place to practice patience! It is beautiful, so why worry if it takes 15 minutes to snap a photo?
We enjoyed a snack while taking in the beauty of the arch and some fantastic people-watching.
Rock Art Panel
After Delicate Arch, you can stop by Wolfe Ranch and take a look at the very cool Rock Art Panel.
We were blown away by the colors and grandness of the petroglyphs. The park has done a great job of providing context and history of the Art on site. Make sure to check it out!
Windows Road
Next, you’ll make your way down Windows Road. On this road, there will be frequent parking lots with paths to beautiful arches and rocks.

For the easiest travels, head to the end of the road to the roundabout and park.
From this parking lot, you will be able to access the hikes for the North and South Windows, Turret Arch, and Double Arch.
All 4 (well.. technically 5) of these arches were nothing short of incredible. It is mind-blowing to think that these beautiful features are created by something as simple as sand being blown by wind!

You will find many, many cool spots for a photo so if there are people hanging out in a spot you’d like to get a photo – keep going and circle back! We promise, there are a lot of options and angles!
After the Window loop, you should head to the Garden of Eden.
Garden of Eden is a great “wandering” area – there is a path but there is ample opportunity for exploration beyond the path that is still safe for you and the landscape.
By the parking lot, you will also find the Owl Rock formation. Additionally, there are frequently rock climbers in this area which are always fun to watch!
Once completed, you should finish your Arches National Park exploration with a drive to any other views (Balancing Rock for example). Don’t forget to stop by the Visitor Center for the most up-to-date information.
Where to Stay for Arches National Park
The best town to stay in for Arches National Park, as well as the Nothern Canyonlands we will visit tomorrow, is Moab.
Moab will be the biggest town you have seen during your 7 Day Southwest road trip, but it gets pretty crowded since there are many places to day trip to from this location!
Most of the major hotel chains have one or more locations in Moab. If you’re looking for a more specialty hotel stay in Moab, check these out:
- Under Canvas – ever wanted to try glamping? While you may be staying “under canvas” these accommodations rival some of the nicer hotels in Moab.
- The Gonzo Inn – the bright and colorful rooms and prime location are sure to make for a great stay!
- Moab Springs Ranch – these bungalows and townhouses are charming and the location is a bit closer to both Arches and Canyonland
There are also great rental properties to choose from:
- Moab Flats | 1 Bed, 1 Bath – This space would be great for a couple or a small family, centrally located
- Cottage with prime location | 2 Bed, 1 Bath – Located right off the main street, this cottage will be a cozy home for a small family or group of friends
- Entrada at Moab | 4 Bed, 3 Bath – A perfect place to unwind for families or a larger group
Looking to camp or RV? Moab has plenty of options:
- Devils Garden Campground – this campground is inside Arches National Park. Reservations fill up quickly so be sure to start looking for them 6 months before your trip on recreation.gov
- Kayenta and Wingate Campground – both campgrounds are in Dead Horse State Park, which is on our itinerary for tomorrow, day 6.
- Sun Outdoors Arches Gateway – located just on the outskirts of Moab, this RV and campground offer great amenities like a pool and great views
Where to Eat in Moab
Due to Moab’s size, there are more than a few options for food.
A few local favorites include:
- Moab Canyon Pizza Co. – is there anything better after a long day of hiking than pizza? We don’t think so. Check out their mouth-watering flavor combos
- Desert Bistro – craving something a bit more elevated? Desert Bistro serves adventurous, elegant cuisine that is sure to impress
- Giliberto’s Mexican Taco Shop – looking for some no-fuss tacos and a Jarrito? Giliberto’s has you covered. Don’t skip the street corn!

Day 6 – Canyonlands National Park and Dead Horse State Park
Driving from Moab to Canyonlands National Park
For Moab, the northern section of Canyonlands National Park is super close. This section is referred to as the “Island in the Sky”.
From Moab, you’ll travel north on Route 191 for roughly 11 miles and then take a left on UT-313 W and keep driving until you reach Canyonlands. The full drive takes about 35 minutes.
Cell service is pretty weak once you are on UT-313 W so we recommend having an offline map.
Canyonlands National Park Itinerary
The Island in the Sky is remarkable. This “island” is a mesa surrounded by 1,000-foot sandstone cliffs.
It feels familiar to the Grand Canyon yet unique at the same time. It is a must-see on your 7 Day Southwest Road Trip!
Sunrise at Mesa Arch
Start your morning off by watching the sunrise from the Mesa Arch because WOW – it was seriously the most perfect morning.
The way to the sun sparks off the arch and the canyon is nothing short of incredible.

White Rim Overlook
Once you have taken in all the beauty of the sunrise, head down, by car, a bit further to White Rim Overlook. This trail is an easy 1.8 miles round trip.
It is one of those trails where you keep going “Wow, this is the best view”, and then you go a bit further and you’re rewarded with an even better view.
We also believe this is a spectacular early morning hike – the way the sun radiates off the canyon walls is magnificent.
Aztec Butte
Next, head to the Aztec Butte.
The Butte is like a big table that rises out of the ground. The Indigenous People who once lived in this area used this butte to store food and medicine, and you can still see relics of that!

This hike is more on the moderate to difficult side and is 1.7 miles in total.
Additionally, once you are on top of the butte, the wind is pretty strong and the temperature lower so if you are easily cold (like Kelsea), bring a light jacket!
The trail is inclusive of 2 sides for a fork. The eastern path will take you up to the top of the Aztec Butte and then the western path will take you to the smaller butte, Lower Butte, that has the indigenous granary (do not touch!).
Both buttes require a decent amount of rock scrambling and steep ledges. We both felt like we were channeling our inner mountain goat!
Be sure to follow the cranes, take your time, and be careful.
Upheaval Dome
Last, but not least, head to Upheaval Dome.
Honestly, we are kinda at a loss for words for how to describe this. It is one of those things you just have to see.

Unlike the rest of the Canyonlands, which has been formed by hundreds of thousands of years of sedimentary deposits, water, and wind, Upheaval Dome’s origin is a mystery.
Within the geologist community, theories around Upheaval Dome are hotly debated. Is it a slow-moving salt dome or an instantaneous meteorite impact?
If you have a chance to go when there is a Volunteer or Ranger speaking about it, definitely take advantage of it! We learned a lot (or as much as there is to learn) from the volunteer that was there the day we went.
If your legs are a bit tired, you can just go to the first overlook and be able to take in the magnitude of the dome. The trail to the first overlook is .3 miles one-way.
We ventured the 1.2 miles to the second overlook and saw the dome from more angles, which we thoroughly enjoyed. Note that the trail to the 2nd overlook has a few rocky patches and places next to dropoffs.
Dead Horse Point State Park Itinerary
On the way out of Canyonlands National Park, you will pass Dead Horse Point State Park getting back to the main highway.
If you have an hour or so and don’t mind paying the $20 vehicle entrance fee, stop by!
We really enjoyed the view from Dead Horse State Park. You get the beautiful canyon bend viewpoint like at the iconic Horseshoe Bend you’ll see tomorrow.
Truth be told, we were split on which one we liked better! Nicholas preferred Dead Horse State Park, while Kelsea preferred Horseshoe Bend.

Be sure you walk around the entire loop. Each angle provides a new perspective!
We also recommend stopping by the visitor center/museum to learn more about the park and the history behind it.
Lastly, we took a stroll along the canyon wall on the River Overlook trail. It was easy and fairly short but a great way to take in a few more canyon views before you leave this gorgeous area.
Driving from Moab to Page
To make the most out of the last day on your 7 Day Southwest Road Trip, drive to Page in the afternoon/evening of Day 6.
The drive from Dead Horse Point State Park to Page is our longest at 5 hours and 15 minutes (300 miles).
The best places to stop for food and gas along the way are:
- Moab (40 minutes, 33 miles into the drive)
- Blanding (2 hours, 108 miles into the drive)
- Oljato-Monument Valley (3 and a half hours, 181 miles into the drive)
Where to Stay in Page, Arizona
There are several places to stay in Page.
As with Moab, most major hotel chains have a location here. A few hotels that we would recommend are:
- Best Western View of Lake Powell Hotel – this Best Western has a balcony overlooking a gorgeous Page view that even includes Lake Powell when the water is high
- Courtyard by Marriott Page at Lake Powell – a large Marriott property with beautiful views, conference rooms, pool, and gym facilities
- Hampton Inn & Suites Page Lake Powell – standard hotel with an indoor pool and gym facilities
Check these out for rental properties:
- The Lake and Trails are Calling | 2 Bed, 2 Bath – a charming house with an open floor plan in a great neighborhood for Page
- Santa Fe Style Custom Home | 3 Bed, 3 Bath – a modern house with a fantastic desert view, garage, and a hot tub
- South Shores Lake Powell Gecko | 3 Bed, 3 Bath – great house, right off the main area of Page
Where to Eat in Page, Arizona
Page, AZ is a great local community with good restaurants!
Below are a few of our favorites or you can check out our best 18 places to eat in Page, Arizona:
- Big John’s Texas BBQ – known for their brisket and retro vibe, this BBQ joint packs a lot of flavor into every bite!
- Bonkers Restaurant – American and Italian dishes served in one of the oldest buildings in Page!
- BirdHouse – fried chicken and beer, anyone? BirdHouse elevates comfort dishes and offers a wonderful indoor and outdoor dining experience. It was our favorite!

Day 7 – Antelope Canyon and Horseshoe Bend
Antelope Canyon and Horseshoe Bend Itinerary
Can’t believe it is our final day already! 🎉
While we might already be having the end-of-vacation scaries, let’s make the most of this last day because Page, Arizona is truly beautiful!
Page is known for the iconic Antelope Canyons and Horseshoe Bend. Antelope Canyon has spectacular canyon walls, formed by years of erosion, attracting visitors from all over the world.
Located on Navajo land, Antelope Canyon is divided into two sections: Upper Antelope Canyon and Lower Antelope Canyon. There is also Canyon X which is a bit further away!
Check out our comparison of the two canyons, as well as helpful information on what time of the day to book your tour.
Both Canyons require a guide to hike them, as you can not go on your own. We strongly recommend booking well in advance!
Picking a reputable company is so important! Below is the company we trust to give you the best experience:
Upper Canyon Tour
Horseshoe Bend can be done without a guide. The city charges $10 per vehicle to enter. It is then a quick 15-minute walk to the viewpoint.
Doing one of the Antelope Canyons and Horseshoe Bend will take around 4 hours.
If you’d like to add an additional activity, head to Lake Powell! Located on the border of Utah and Arizona, the lake is known for its stunning red rock cliffs, clear blue waters, and opportunities for activities like boating, fishing, and hiking.
With a couple of hours, you could rent a kayak and paddle around to see some stunning views of the lake!
Antelope Kayak offers a guided tour through the pristine waters of Lake Powell and even takes you to hike through Water Antelope Canyon, accessible only by water.
Wrapping up your 7 day Southwest Road Trip
Page, AZ to Las Vegas
If you are looking to save some money with a roundtrip flight and car rental, you’ll want to head back to Las Vegas from Page. This drive is 4 hours and 23 minutes (273 miles).
The drive, while a bit long, is a beautiful one! It is a terrific recap of all the stunning red rock and mountainscapes you have seen over the last 7 days.
Page, AZ to Flagstaff
If you would like to opt for a shorter drive, you can head south to Flagstaff.
Flagstaff, AZ is only 2 hours and 15 minutes away from Page (129 miles).
This drive will take you through the beautiful Gray Mountain. If you have another day or two, you can enjoy wonderful Flagstaff, the Grand Canyon, or take a day trip to Sedona.
Suggested Packing List
For your Wallet
As you can see there are A LOT of National Parks on this itinerary. If you were to pay individually for each, you could easily spend $200+ just on park fees.
For this reason, make sure you grab your America The Beautiful National Parks Pass before you head out on your 7 day southwest road trip. It costs $80 and is good for a full year!
You can grab it online or at your local REI. We have saved a ton of money with this pass.
⚡️ TIP: we recommend looking closely at the signs in State parks because they occasionally accept the National Parks pass as well!
For the Car on Your 7 Day Southwest Road Trip
Using a rental car? We recommend packing these items to make your rental experience easy-breezy.
After all, you are spending more than a few hours in that car this week!
- Phone Holder – You never know if your rental car will have a screen that you can put the directions on. For this reason, we always pack a phone holder so we know we will easily be able to see our navigation!
- Phone Plug – Got to keep your phone charged during navigation!
- Portable Car Jumper – the only thing that is worse than your car not starting at home… is your car not starting somewhere unfamiliar. We love this small, portable car jump starter. It is fantastic peace of mind while on a road trip!
- Collapsible Cooler Bag – having cold drinks and snacks at your disposal is critical for a smooth road trip! This cooler collapses down so that it is easy to pack for your plan right but is large when you need to fill it up for the car.
- Car Game – we love a car game! “Shotgun!” is a great game for the whole family and is sure to bring big laughs during your drives. Plus, it is small and easy to travel with!

For your Hiking Bag on Your 7 Day Southwest Road Trip
Your 7 days in the great American Southwest are filled with hiking – make sure you pack all the best gear so that you are prepared.
Here are our top must-pack items for hiking trips:
- Hiking Pack – a great hiking backpack is paramount! This bag has been to the top of many peaks with us. It is sturdy, breathable, and super well-made!
- Water Bladders – Water is life on the trail and we don’t think you can ever have too much. These bladders are fantastic and VERY easy to clean which is so important!
- Pro Tip – also grab these slender ice packs and stick them in the bag by our back and up against the bladder. It helps keep you and your water cool!
- Shoes – Your feet will thank you for having a great pair of shoes! We are big fans of Columbia hiking boots. Kelsea loves these women’s high tops and Nicholas likes these men’s low profile shoes. Whatever shoe you pick, make sure it is waterproof and that you break them in before you head out on this adventure!
- Hiking Socks – a cushioned hiking sock is a game changer! Frankly, I’m not sure how I ever hiked in anything different. Make sure you have these packed!
- First Aid Kit – Definitely something you hope you never need but you should definitely have it just in case! We vetted many first aid kits and this one is compact but has a great variety of supplies. We add some packets of Benadryl, Advil, and liquid I.V. to the kit as well as a whistle.
- Headlamp – want to start a hike before the sun? You will definitely want a headlamp! Also, they are smart to have just in case a hike takes you longer than expected and you are still hiking post sunset. We recommend keeping the batteries separate so that they don’t accidentally become drained if the headlamp turns on in your pack.
- Sanitary Wipes – super helpful when we want to have a snack and our hands are a mess! Also, we have used them to wipe ourselves down on more than one occasion when we got a little too close to poison ivy. Just make sure you take them with you and leave no trace!
- Towels – These gems pack super small but are fantastic at drying you off. You never know when you might encounter some water that you must wade in!
- Hat – We always have a hat while hiking! They are great protection from the sun. Nicholas is on his 3rd Sun Cube hat – he likes them so much!
- Sunscreen – we always wear sunscreen! This is an eco-responsible brand, the bottles are easy to pack, and it does not come off easily when you sweat.
Enjoy your 7 day Southwest Road Trip!
If you’re looking for an epic Southwest road trip that will take you through some of the most beautiful and iconic scenery in the United States, this is the route for you.
Just be sure to pack your sense of adventure and prepare for a week full of unforgettable memories.
We wish you the best travels, and don’t forget to set your “Out of Office!”
🌟 Loving our content? Support the journey and buy us a coffee! ☕️